
- Chat! Get help. Share Monsters.
- World-wide fans & players
- Community run & moderated MR Subreddit
- If Discord isn't your thing.
Community Tournaments
- PVP & Event Calendar
- Multiple Hosts, Games & Formats Challenges
- Speed Runs & Nuzlocke Social Media & Websites
- Official and Fan channels
Please Donate!
Your contributions help keep
the site and archives going!
Create Monsters at the Shrine! MR1 DX Song List (EN) MR2 DX Song List (EN) Ultra Kaiju MR Keywords (EN) Ultra Kaiju MR Song list (SEA)
PS1 CD DB & Tools
 GameBoy Advance
 Ultra Kaiju MR
Beginner's Guide & Walk-through for
Monster Rancher 1
What is Monster Rancher?
Monster Rancher 1 is a simplistic game once the mystery has been removed. At its core, Monster Rancher is an open-ended pet raising simulation with real-time battle for tournaments and progression. There are basically 2 budgets; Your Gold and your monster’s Lifespan, and you want to make the most out of both to have a productive monster. Because there is a lot of variety, this walkthrough is not going to give you exact step-by-steps, but instead help you make the required determinations so that it can be applied to any monster.
~ Suggestions for revisions or additions are welcome.
 On a fresh play-through you will be introduced to your assistant Holly, along with a few FIMBA organization members (Fraternal International Monster Breeders Association).
(The Japanese phrasing is Federation International de Monster Battle Association, a word-play on FIFA's The Fédération internationale de football association).
Ultimately you will end up in Town where you can pick your first monster. This can be done either from the Market or the Shrine.
Market: a choice of a baseline Dino, Tiger, or Suezo. These are static choices and never change.
Shrine: The game’s famous gimmick; Pop in CDs and seeing what monster you get.
Disc Stones (Shrine): While at the shrine, if you see this message, you have attempted to shrine a monster that is locked behind in-game events or accomplishments.

If you see this message, You have attempted to create a monster that is locked behind such an event. See the Unlock Everything guide for Ranch and Monster unlocks.
MR1DX (2021) replaces the old 1997 CD gimmick with a Song List lookup feature instead that also has a Randomize button to simulate putting in any given CD at random. The Song List database is finite. You can search by Title, or Artist, or Both. It is easier to search in only 1 field, and Partial searches will automatically include a wild card for the remainder of the searched Titles or Artists.
Which monster to pick? This is personal preference. If the market monsters seem bland, use the Shrine and start with your favorite Artists. although you can choose intentional monsters if you look at the Shrine Song list on the site. Some monsters behave differently than others based on a hidden attribute (Seriousness) that cannot be observed without looking at the song list and avoiding the bad ones, or using 3rd party tools that can read the game data and indicate it. The higher Seriousness value, the easier time you’ll have raising your monster.
Hare and Dino can be great first monsters, however, If you are still uncertain, just pick the one that is the most interesting to you, and do your best to apply this guide's information to it.
NOTE: On a new game, some monsters are locked, so while at the Shrine, there's a chance you will be told you can't use that particular CD. The notice is just an indication that there are in-game events you must complete to unlock the monster it would otherwise create. Locked monsters are just like any other monster, some are easier or more challenging to raise. Unlocking the additional monsters are a remnant of the 90s games to include replay value and something to do after getting to the game's credits.
Unlocking some monsters often requires using some found item while fusing 2 monsters together, or possibly other conditions involved, to create a new breed of monster correlating to the used item and condition.
Combining can create stronger babies. The combining process can create new crossbreeds for you, or can be beneficial for monsters to pass down Stats, Techs (attacks), or both. On a fresh game as a new player, don't expect to see much from combining except to have a monster possibly start with a few extra attacks, and to unlock hidden monster breeds that use combining to unlock them.
Combining for super babies with incredibly high stats is not straight forward and is considered a more advanced topic. Technical details are fully covered in the Combining guides once you're ready for more advanced (but optional) meta mechanics.
Now that you have your monster, it’s time to take it to the ranch! This is where most of the menu and choices are. You’ll likely be bombarded with multiple messages from Holly on this first week on the ranch such as Preparing for an Official Tournament, or a Training sale notice. IGNORE THIS; This is just an unfortunate lining up of events triggered by the game on the very first week without explanation or context.
Official Tournaments will promote your monster to a higher Grade and more difficult opponents (probably not something you want to do right out of the gate), and Training is for learning new Techs (attacks) and has minimum stat requirements that must be met before they can be learned. As a baby, it’s likely to fail multiple weeks and not learn any new attacks. We’ll cover Training more later. For now, it’s time to put your monster to WORK so you can start raising its stats.
Oh and while we’re here, Visit the Item shop before you do anything else, and start the dialogue with the Shop keeper. You don’t need to do anything else at this point. Once introductions are complete you can exit this menu to get back to the main Ranch menu.
- LIF: Health Bar.
- POW: Increases POW Attack damage (
 Yellow Tech Icon).
 - DEF: Greatly reduces damage from both POW and INT attacks.
- SKI: Increases Accuracy / Counters opponent SPD.
- SPD: Increases Dodge / Counters opponent SKI / Adjusts Arena movement.
- INT: Increases INT Attack damage (
 Green Tech Icon).
- Light work raises one stat a minimal amount but causes a lower amount of stress and fatigue.
- Heavy work can raise two stats at a time (A primary stat and secondary stat by a lesser amount) while dropping a third stat, at the cost of higher stress and fatigue.
Holly only warns you about Stress on week 1 of every month and only if your monster is on the ranch. Holly gives you weekly status updates regarding fatigue which is also indicated by your monster huffing and puffing around the ranch if it has become overly tired.
Which Work should you do? More on this below, but there are 2 primary considerations to observe here: What Work (stat gains) is your monster good at, and what kinds of Techs (Attacks) does it have (or do you plan to get)?
 Stat Gains: Before committing to which stats to focus on, first look at your monster’s data. Once again, without looking at the Monster Data, Song List, or using a 3rd party tool to see what the stat gains are, you’ll have to make some assumptions. Every monster can have different affinities towards certain stats.
What do the letters mean? You will see in the guides that there are Letter or Numeric indicators for Stat Grows.
- E - A is most commonly used in guides.
- E is the lowest value/range and works it's way up (E < D < C < B < A)
- Some guides may also list the numeric, 1 - 5.
- In rare cases values will be documented as 0 - 4 (the internal game code for the same value).
Techs: Most babies are born with 2 or 3 starting Techs. You can use Training to learn more techs later. There are a few outliers with special exceptions that can be born with more.
Almost all monsters are born with POW techs, and sometimes they are born with INT techs. Monsters have 12 total attacks that can be learned. Some have an even mix of INT & POW types, while others are heavily lopsided to one or the other attack types. While it might be a spoiler, it’s worth it to look up your monster’s Tech List to see what options it will have available to it to help in your decision making about which stats to raise. You may not want to invest heavily into INT if your monster only has POW Techs, etc. But it’s also possible that a monster’s best Techs could be ones they’re not born with, so knowing in advance can be helpful here as well.
Techs with Yellow icons use POW as their base damage stat.Techs with Green icons use INT as their base damage stat.What does all this have to do with Work?
Now you’re at a good decision point to know which stats to focus on based on your monster's Gains and current or future techs. As a new player in a fresh game, raising all the stats high is very unlikely, and in most cases raising stats very evenly feels strong at first, but by the late game you won’t have enough punch to knock out the end game monsters. Instead, you’ll want to focus a few stats heavily with a couple of backup stats.
- Choose 1 attacking stat (POW or INT) for your monster.
- Choose 1 defensive stat for your monster (SPD or DEF).
- Always supplement SKI in your routine, this is very important later
- Enough LIF to avoid 1-hit KO for speedsters, or Loads of LIF for slow tanky monsters.
SKI is a secondary stat and has no Heavy Work to help raise it by large amounts, but it is incredibly important to keep this stat raised as you progress through the game. Opponents will inevitably get faster (high SPD) and your SKI stat helps counter the opponent’s SPD and helps increase the base accuracy of a given Tech.
Keep a minimum amount of your defensive stat! With the above in mind, your drop stats from Work will eventually reach "1 / LV0". The end game will be noticeably rough around A and S grade, so when you have the opportunity, Be sure to raise these back up to LV1 or 2.
DEF is a divisor stat in MR1 and is incredibly over tuned. Even if you primarily focus SPD on a particular monster and drop DEF, try to keep at least 50 to 100 DEF. Allowing DEF to drop to 1 means no damage reduction at all, while an opponent's attack stat is scaling their dmg potential. This can lead to being hit for 999 dmg even at E Grade levels. Even small amounts of DEF remove this possibility off the board.
Alternatively, if you focused DEF instead, keeping only a 1 in SPD means you'll almost always be hit, and never dodge. Either be sure you have huge amounts of LIF to soak hits, and/or enough SKI and Attack Stat to land a heavy hitter or one-hit-KO to end the match before you are chip-damaged and lose by %.
When you do which drills is important! If you paid attention to what your monster is good at, and have determined which stats you will be raising, the most efficient way to gain the most stats, is to:
- Drill for the stats they are best at during the early life stages when the stat scaling is low overall.
- Avoid the Stats they're bad at during the early stages because the gains of stat points per week will be incredibly low by comparison and you have a finite amount of lifespan to work with.
- Catch up your dropped stat (either SPD or DEF) or stats they're bad at, as needed/up to acceptable levels during prime stages when stat gains will be at their best.
Use Training as a Heavy Stat Gain -- IF you have a Calm Stone and you have the second Stable upgrade, you can use training as a month-long heavy work to raise stats without extra lifespan hits, but you must use Taffy & Mint when your monster returns before proceeding into the next week.
Do you qualify?The Training locations will require specific prerequisites to learn a new attack. This is why the beginning of the guide mentions to avoid the Training sale at the beginning since it's highly unlikely you'll qualify on a fresh/new game.
Without using tools or the Tech List, You can gauge qualification based on the Training Location's associated Stat. For example:
- If the Locale Stat raises LIF (Alta Vista), Your monster's LIF stat is used as the gauge etc.
- 250 and 500 are the Stat level thresholds to learn an attack (Salem & Reno only have a 500 threshold)
- Add your monster's gauged Stat + Loyalty. If this number is over one of the thresholds it can learn the attack.
- If the gauged Stat + Loyalty is under the threshold, the game also adds a random number (0-99). After the RNG is added, if the monster meets or is over the threshold it can learn the attack.
Which Training to send to? The locations aren't arbitrary. They teach very specific attacks and represent an attack type regardless if the Tech uses POW or INT as it's base damage. (Just because a location raises Power doesn't mean it teaches POW based attacks etc).
- Hit Techs: Learned from Tonga. Generally low damage, higher hit rating.
- Heavy Techs: Learned from Alta Vista. Generally low hit but higher damage.
- Wither Techs: Learned from Barees. (Wither = Will damage instead of Health damage)
- Ranged Techs: Learned from Hartville (Monster is C class+)
- Special Tech #1: Learned from Salem. (Monster is C class+)
- Special Tech #2: Learned from Reno. (Monster is C class+)
Should I use Training to raise stats? Typically you want to use Work as the primary method for raising stats. Training is expensive and not sustainable on a fresh game, and it's 4 weeks in a row of building up stress and fatigue without being able to use items to keep them in check. Work only lasts 1 week, which gives you opportunity to use Items to reduce stress and fatigue inbetween work weeks so you don't negatively effect your monster's lifespan.
however, there are conditions you can use Training without lifespan hits. If you have the second Stable upgrade along with the Calm Stone and Fire Stone in inventory, you can use Training as a Heavy work without a lifespan hit. (You must use Mint Leaf and Taffy the week you return to normalize Stress and Fatigue levels).
Monthly Items: Always feed Meat every week 1 whenever possible.
Since successful Work always gives you a bit of money, this should be very easy to afford. Meat adds +1 week of lifespan to your monster and reduces a small bit of stress. If you cannot afford Meat, Fish is a neutral food you can feed with no benefits. Avoid Potato unless it is the only way to avoid a Game Over by running out of money.
Weekly Items: While you may not be able to afford it yet, Taffy and Mint Leaf are the only items you should concern yourself with for normal monster raising. If you see a Shop sale, these are the two items you want to stock up on. These two items drop Fatigue and Stress respectively by a static amount and can even be used to replace rest entirely (meaning more weeks to raise stats). Some shop items do have a niche use, but for a new player and fresh game, don’t worry about these yet. You can always view the Item list page to see every item’s exact use later.
 You need money. It’s important to save up to a point, but you also need to invest money into your monster which returns on that investment by living longer, allowing you to raise stats longer and fight in more (or higher) tournaments that have higher payouts.
There are many tournaments littered through out the year. Official tournaments give the least amount of money, and the regular tournaments in-between will give more. Promoting your monster too early can land you in a difficulty bracket where you can’t make money, and the game penalizes for fighting in a bracket below your monster’s current Class.
Official Cup tournaments: (Week 4 in March, June, September, December) are used to increase your monster’s Class, and promote your monster to the next level of tournaments & difficulty. If you haven’t beaten that level yet, it will also increase your Breeder Grade which serves as one of several things to progress the game.
Non-Official tournaments: Any tournament that is NOT an Official Cup won’t raise your monster’s Grade or Breeder Grade, but will reward more money, or items that can be sold for money, or even a few tournaments that are story driven to help unlock some of the hidden breeds that you don’t yet have access to. Feel free to sell any CD Fragments you get for extra money on top of the prize money.
Battles reduce stress but cause fatigue. If your monster is tired before entering a tournament, use a Taffy to get back into shape (or rest the week before). Use a Taffy after battle to recover the fatigue and you can immediately resume your Work schedule, otherwise you’ll likely need to rest if you can’t afford it yet.
1st place or bust! Tournaments are detrimental towards your monster’s lifespan, but losing, coming in last, or being injured are a progressively larger lifespan hit for your monster. Tournaments are unavoidable, you must fight in them to earn income and progress in ranks. If you want to be sure to capitalize on your monster’s lifespan, always save before a tournament. If you can’t win, reset, and try again or just don’t fight and keep raising your stats until you can win.
Fame increases your chance to critically hit. Crit% = Fame x0.2 (except at 100 Fame it is 19% instead of 20%). Fame is also a value used to qualify you to be invited to expeditions.
 The Arena and fighting in tournaments introduce new mechanics apart from your pet raising sim portion of the game. Matches in a tournament last 1 minute. Each fighter starts with 50 Will and can regenerate up to 99 Will. Will is the resource for your Techs (Attacks) and different Techs have different costs. Additionally, there are 4 ranges in the arena, and Specific Techs fall into 1 of these 4 ranges and can only be used while your monster is in that range. You can change your range by moving forward or backwards. If you have more than one Tech to use in a particular range, you can toggle the currently active Tech.
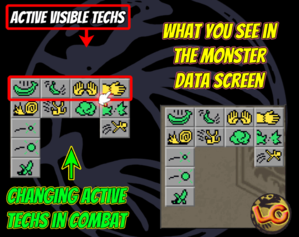
Changing the Active Tech
- There will be a red select box that has a given range highlighted
- Press Left/Right (D-Pad) to Move the select box to the range that has multiple Techs, and you will see a red arrow.
- Press Up/Down (D-Pad) to cycle through that range’s available/learned techs.
The arena has limited space. When up close/range 1, You can push your opponent back to force range 3 or 4, but if you are too far on their side of the arena, you will have to move backwards instead. Alternatively, you can only back up so far.
The more Will you have, the better! Saving up Will is advantageous as it increases hit% and damage. It is very tempting to spam attacks immediately to try and KO an opponent before they can hurt you, but if you can’t win easily this will put you in a bad spot, because the Opponent will get the same benefit. While attacking, the Attacker’s Will is frozen in place (and subtracts the Will spent to perform the attack), meanwhile the Defender’s Will is still regenerating the whole time. If you can dodge or soak the first attack or two, this will put you at the advantage. It also opens up opportunity to attack while the opponent is confused!
Observe your Opponent: Pay attention to opponent stats, especially their Attacking Stat (POW or INT). Try to stay in the range of their weakest techs or supported by their weakest attacking stat. You can often force a Will advantage by dodging/soaking weak hits then retaliating after.
Confusion/Foolery: When the attacker’s Tech icons convert to "?" in each slot and does an animation that isn’t an attack, and their chance to dodge drops significantly, indicated by the attacker’s hit% increasing for a short duration. Confusion is caused by low Loyalty. As your loyalty increases the chances of this happening decrease, but Tournament opponents don’t evolve over time, so they always retain a chance for Confusion which you can use to your advantage, especially if you have a hard-hitting attack with a low hit%/SKI. Patience can help win fights!
Know your attacks: There are different attack types. Some are heavy hitting with low accuracy... others are low damage but high accuracy. Use the appropriate Techs for the opponent, and for which stats you've raised.
Techs with Yellow icons use POW as their base damage stat.Techs with Green icons use INT as their base damage stat.Techs (Attacks) Also have their own attributes. Each tech has letters as values indicating a Tech's attributes.
From weakest to strongest: E < D < C < B < A < S... The letters are an approximation. The techs do actually have specific numerical values assigned to them.
- Pow./Int.: (Power/Intelligence) The Tech's base damage stat. Raising this stat will increase the damage of the Tech.
- Con. Will: The amount of Will points it takes to execute the Tech
- Hit%: the base % chance to hit from 50% (-10 is 40%, 10 is 60%) before your SKI, or opponent SPD adjustment.
- Damage: The base damage of a tech before POW or INT stat adjustment (or opponent's DEF adjustment).
- Tak. Will: Will damage to the opponent (Will/Tak. Will known as Guts/Withering in future games)

Along the way, several Breeder ranks will prompt you to upgrade your Ranch via the Stable, House, or both. These are permanent upgrades that future monsters will benefit from. To be prompted for an upgrade you must have enough gold on May week 4 to afford the upgrade cost + 5000 so that you are not left broke. The last Ranch upgrade will occur at Rank 6 if you have the funds, and all upgrades combined will be 39,500g. Plan ahead so the expense doesn’t catch you off guard. Once the upgrades are done, then there are no other expenses except what you spend on your monster.
When should I progress in Official Cup tournaments? The choice is ultimately up to you.
With your primary attack stat as the focus/highest stat, consider the following stat totals as a rough benchmark when to fight in the official.
| Fight in Grade: | When Attack Stat is: | And Stat Total is: |
|---|---|---|
| E | 200+ | 800+ |
| D | 300+ | 1000+ |
| C | 400+ | 1200+ |
| B | 500+ | 1500+ |
| A | 600+ | 1800+ |
| S | 700+ | 2100+ |
| Big 4 | 800+ | 2300+ |
Remember, it's OK to stay at a certain Grade for a while and participate in many tournaments to earn income you'll need for future upgrades. Promoting too early may land you in a Grade that you can't earn income, and Fame and Loyalty are heavily penalized for fighting in a lower Grade tournament than your monster's current class.
IF you are having issues beating the game don't use your progression monster as your income monster. Have a few fodder monsters to earn the money first, then go all in with Work on your Progression monster (and possibly Training if you have the Passive and Barn upgrade). Put off fighting with your progression monster until you're fairly confident it can do very well in the higher Classes.
My Monster Died! Now What? Spoiler.. your monsters can die. Anything you've earned with your monster is kept. Hopefully you've earned plenty of money and can repeat the process, but this time use Taffy and Mint Leaf more frequently to keep your monster in a permanent state of Very Well, which means you can train harder, and longer, and even without Resting.
Monsters will always start out as Babies and at E class. Each monster must re-earn it’s way back up, but hopefully when you are done with the previous monster you are now in a better financial place, or game progression place than you were before. It may feel like a step backwards when starting a new monster (gains feel low because it’s a baby etc.), but you should be able to progress farther than the previous attempt since you’ll have the benefit of ranch upgrades and hopefully even more money so you can start using items sooner.
If you don't have enough money, Holly will not prompt you for the ranch upgrades. You will need the cost of the current qualifying upgrade for your Breeder rank, plus extra to be prompted. Ranch upgrades range from 2000g to 12000g. All ranch upgrades combined come to 39500g.
Refer to the Unlock Everything section in the main guides for specifics.
What does this mean? Your monsters have a finite lifespan. Before factoring in lifespan reductions or extensions that can change a monster's baseline lifespan, Every week that it lives reduces their remaining lifespan by 1 week, until eventually their lifespan is exhausted, and they die.
Holly's Warnings are an indicator that you're reaching close to the end of a monster's lifespan. You will typically receive 2 warnings, the first warning is roughly a year's notice. The last warning is 10 weeks remaining.
What to do to retire my monster? When a monster dies, it's gone forever. There's no in-game option to retire, but the "Retirement Warning" is a chance to put your monster into the Freezer, which means it can be used later for combining, or for PVP if desired.
Should I always retire my monster? It is entirely up to you. Death is a part of the game, and One hidden monsters actually require a death event as part of their unlock condition. The original game takes a small bit of effort, but DX provides monsters born with very low LIF and DEF (which can be killed in Battle) that can be used to trigger these events without throwing away all your hard work for a well raised monster. This allows you the option to keep all your monsters before they die, and if you want to, you can use a dedicated monster for the death event.
Unlocks: There are 8 hidden/locked monsters you can acquire which you may have already happened across by this point. They aren’t necessarily overpowered or better/worse than other monsters, they’re just more choice and options with some fun monster designs.
Worm Cocooning: Worms can cocoon into other species with a worm sub-breed. In addition, they get 100 extra weeks of lifespan from the process, so this can be a very fun endeavor.
Combining for super babies! Combining isn't as random as you think, quite the opposite. With planning, you can engineer parents to create ridiculously amazing babies with incredibly high starting stats or number of techs.
- Make sure your monster is frozen at the Lab.
- Save your game on any numbered save slot.
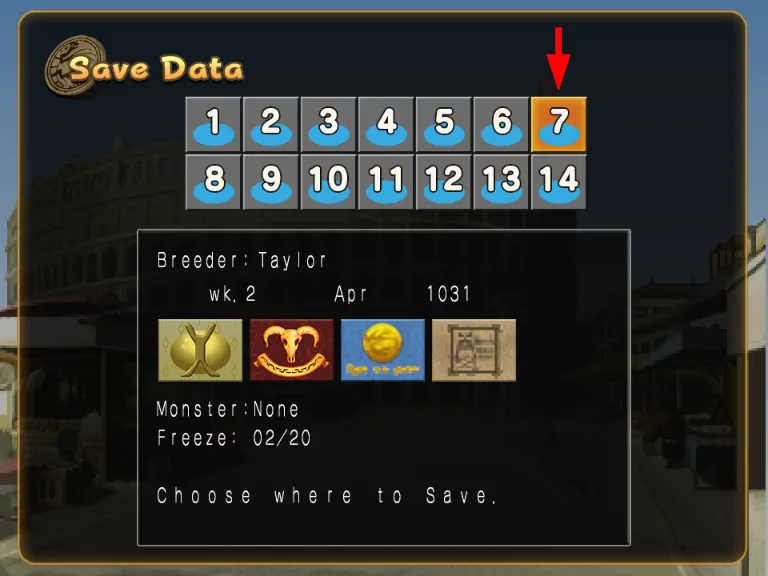
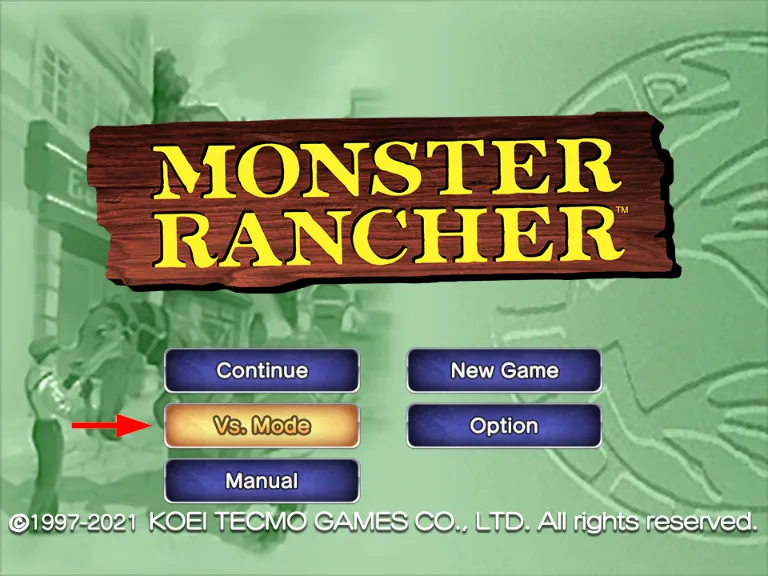
- Exit the game and go back to the Title, and choose "Vs. Mode" in the menu.
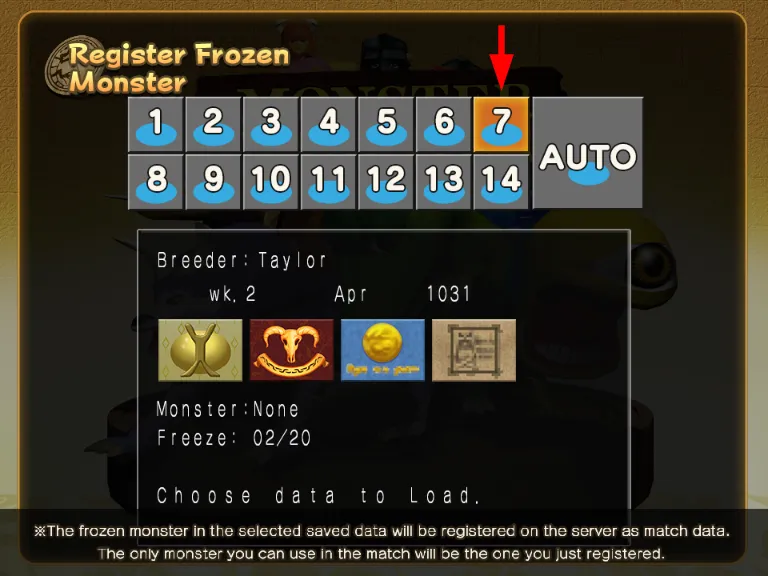
- Choose the same numbered save slot from Step 2, to register the frozen monsters online.
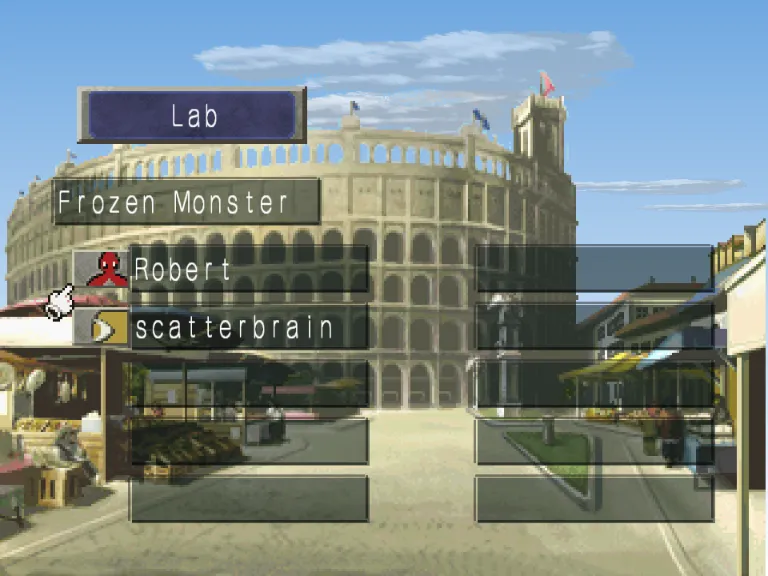
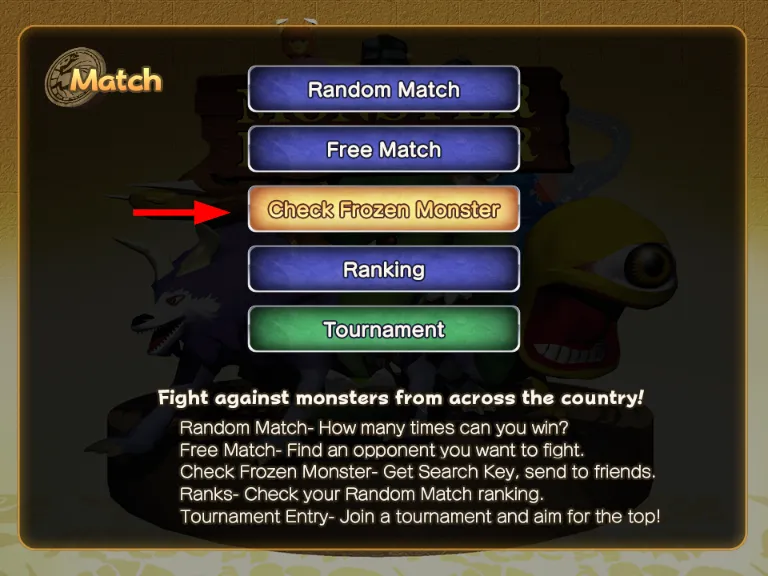
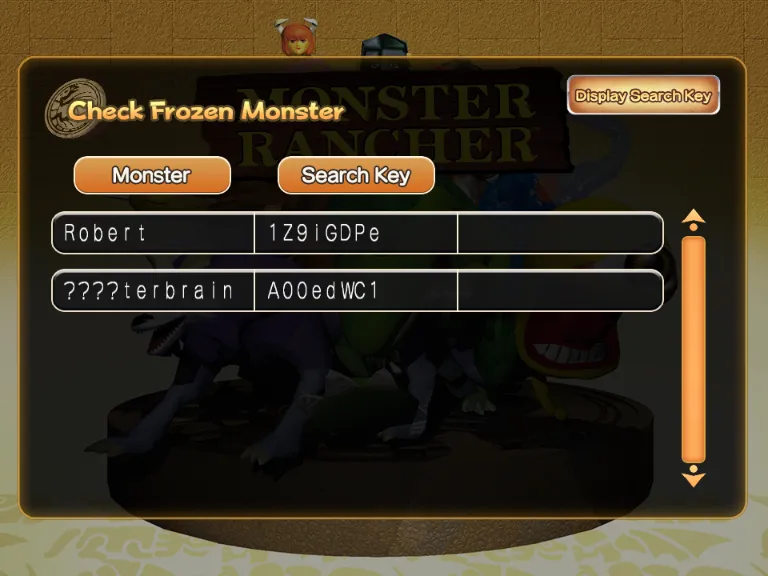
- Once the Frozen monsters have been registered, Select "Check Frozen Monster".
- In the list, confirm your monster shown, then click "Display Search Key".
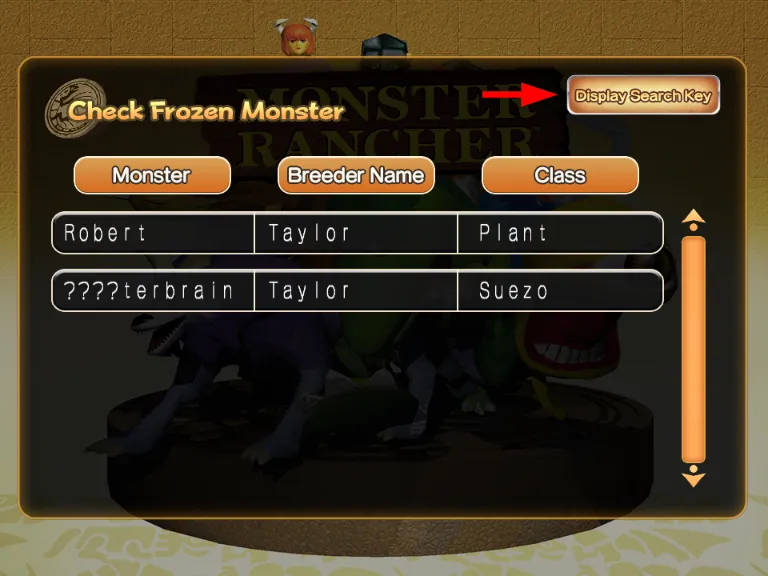
- Note the Search Key. It may be required to submit your monster and is helpful if the monster name has censored character strings.
NOTE: you can only have 1 save slot uploaded at a time. Whatever is the last save uploaded is the only save in the cloud. You may overwrite the save slot on your local game however you want, it will not change what was already uploaded unless you re-register/upload it again.
Your First Playthrough:
- Don't expect to beat the game with your first monster, on your first play through! While it is possible, it's not the norm for a new player, and the game is originally meant to have replay value and played through multiple times.
- To beat the game/get to credits, you must get to Trainer Rank 10. You do this by beating Official tournaments E through S (rank 1-6), then four new S Grade tournaments are opened (Big 4) for ranks 7-10.
- Instead of racing to Rank 10, Use your first monster not for Trainer Rank progression, but to accumulate as much money as possible, as easily as possible.
- Letters as Values are littered through out the game.
- E is the lowest value/range and works it's way up (E < D < C < B < A)
- S is the Highest value/range but isn't present in everything
- These letters are also present in each individual Attack to give a vague indication of their strength for each of your attack's attributes.
- Tournaments
- There are basically 3 tournament types:
- Official: (Progression) These occur 4 times a year and will promote your monster to a higher Class. These have low monetary value.
- Invitational: (Progression) These are story based tournaments with specific invite conditions.
- Everything else in-between: (Income) These are tournaments limited only by your Class. They do not promote you but generally have a higher monetary reward or prize reward that can be sold.
- Don't promote your difficulty too soon by fighting in the Official Tournaments. Instead, fight in the 1-off tournaments for money in-between Officials.
- If the tournaments are too easy, THEN promote to the next Grade for higher tournament money payouts, and keep saving.
- There are basically 3 tournament types:
- Raising Methods: There's no need to use the most advanced methods immediately, in fact you won't be able to.
- However, You can use the Cheap/Destitute raising methods on a new game to maximize lifespan and drill gain potential until you've saved enough money for more rigorous raising methods.
- Stress/Fatigue warnings: While the game warns you when a monster is tired or stressed, it is more advantageous to be proactive, rather than reactive. In either scenario you will have to do something to lower fatigue and stress (rest/feed items, or both), but being reactive means you are also likely losing small bits of lifespan each time you have to correct it after the fact.
- Training is for learning new attacks. It can be tempting with the sale notices, but you don't often need it, and before you have upgrades, . SAVE before you do Training.
- Learning new Techs/Attacks is based on the Stat of the location.
- Sometimes this is counter to what you want since you might have to send to the POW Training but it might give an INT based attack.
- Locations give very specific attacks at different Stat thresholds.
- Use Light and/or Hard Work to raise stats until you can qualify to learn a new attack.
- It's an unnecessary lifespan hit to do Training without getting the Attack you want from it. If you don't learn a new attack, or it's an attack you don't want, then reload and don't do the Training/Try again/Try a different location.
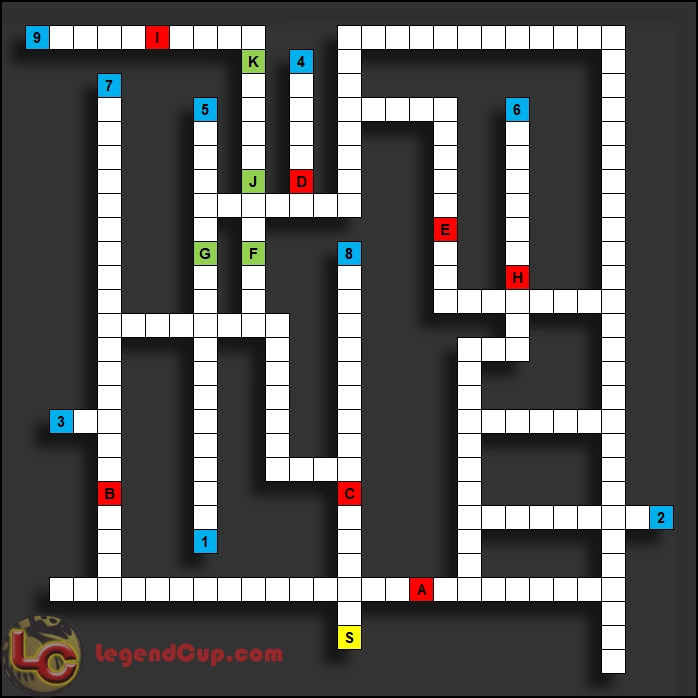
- Expeditions are optional story and in-game progression. They can provide a variety of items useful for selling for cash, unlocking new monsters, raising stats, increasing lifespan etc. (See Expedition Maps guide for details)
- Your first monster/playthrough probably isn't going to be a great expedition monster unless you lucked out or planned it that way before attending. Most advanced players have a monster dedicated specifically for Expedition with the important stats optimized.
- Money is indirectly one of the soft gate-keeper hurdles in the game.
- With Trainer Rank comes opportunity to upgrade your Ranch (without enough money you will never be prompted to upgrade)
- You need money to afford frequent items for raising strong monsters (which can help raise your Trainer Rank)
- With Trainer Ranks, Ranch upgrades, and Strong monsters, you'll have an easier time unlocking the locked breeds later on.
Your First Monster:
- If you're going in blind, be aware that some monsters are harder to raise than others, even the beginning ones.
- If you refer to the DX CDDB (or Monster Data for 1997 version) you can choose a monster with high nature, which will Cheat less and get Greats more on drills.
- The DX CDDB/Data page can show you other Monster Data too, like which stats a monster is good at (E/1 being the worst, and A/5 being the best)
- Avoid keeping stats too even. it's OK to specialize in just a few stats, while taking into account what the monster is good at.
- Typically you'll choose POW or INT, not both. Tech List Preview (POW increases damage of Yellow techs. INT increases damage of Green techs)
- You will almost always want SKI to help your attacks land. Raise this stat in-between hard drills or alternating light drills.
- LIF is a stat that is nice to have, but not always needed. If you always dodge, LIF is unnecessary. If you have a low SPD monster you might raise LIF to help win by %, but either way you'll probably want just enough to at least soak a hit or two just in case.
- Typically you'll choose SPD or DEF, not both, but try to keep DEF at 50 or higher due to the nature of how DEF works in MR1.
- Avoid fighting in the Official Tournaments too soon. The Official Tournaments that Holly tells you about will raise your monster's rank and put you into the next level of difficulty. There are Many non-official tournaments in-between that you can fight in to make money and see how you're doing.
Stats & Techs:
Each stat can be raised ndependently through Light drills. Heavy Drills can raise 2 stats while dropping a 3rd slightly. Some stats are needed in other parts of the game, like Expeditions; POW to break obstacles, INT to find items etc. This information can be found in the other sections.- LIF: Health Bar
- POW: Increases POW (Yellow) Attack damage
- INT: Increases INT (Green) Attack damage
- SKI: Increases Accuracy / Counters opponent SPD
- SPD: Increases Dodge / Counters opponent SKI / Adjusts Arena movement
- DEF: Lowers damage from both POW and INT attacks
- Fame: Increases Critical Hit chance (Crit% = (Fame x0.2). 100 Fame 19% (and not 20%).
Style:
Style indicates a balance Fear and Spoil, which are hidden values that determine your Loyalty. Style is an indicator for you, as the trainer, to understand which side of the scales you're leaning towards.
Loyalty helps you in Battle. Low loyalty means your monster will get confused more often. In battle, when a monster gets confused, their chance to dodge drops dramatically, allowing the attacker a massive hit% bonus. This goes both ways.